
If you have ever been stuck in traffic, you know there is always someone up ahead texting, rubbernecking or just driving too slow. It is totally aggravating and makes you want to stop driving, right? A slow website isn’t that different. It kills any desire your visitors have to make repeated visits – that is if they even stick around long enough for the first one.
This is not the first post written about how to make a WordPress website faster. They will all give you the same core advice – get good hosting, streamline your site and cache – but what exactly does that mean and what is the best way to go about it on a Themify site? Below, you’ll learn why things can go wrong, what you can do about it and what the absolute best solutions are, going into 2017, to give your site the boost it needs.
First Things First – Do You Even Have a Slow Site?
“Slow” is often a relative experience. How we experience the internet has a lot to do with how eager we are to view the content of a site, how stressed we are, or whether we have an awful internet connection. Thankfully, there are some excellent tools out there that can give us some neutral insight to how a site is really performing.
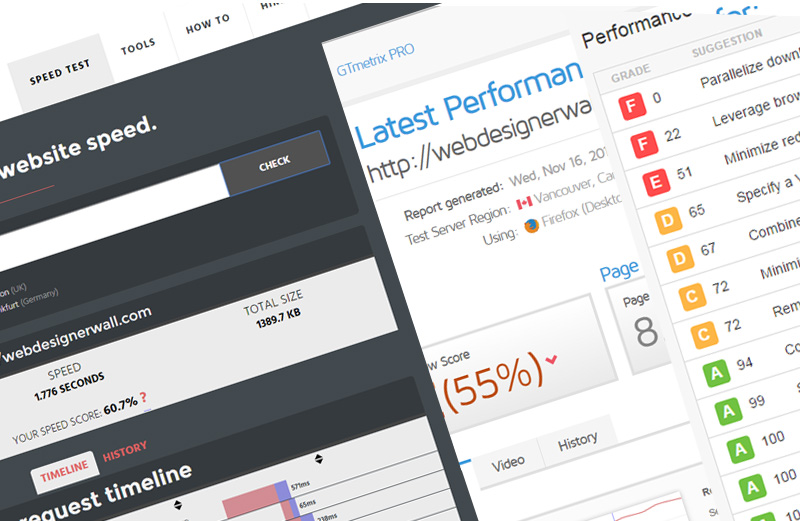
Step 1: Test Your Site
Head over to each of these fine speed tools and pop your URL into the address field to run a free test. If needed, select a location that you want to test from. Usually this is where the majority of your visitors live.
- Pingdom Tools is the most useful for seeing how quickly your site loads, and specifically what is holding it back
- Google PageSpeed shows you how Google evaluates your site. You will be scored separately for mobile vs. desktop browsing performance.
- GiftOfSpeed is similar to Pingdom Tools, but offers a simplified and lovely review of your site’s performance, complete with a "waterfall" or file list to help you pinpoint problems.
Want to go the extra mile? Test your site on these as well:
These sites will provide you with an overall performance grade, load time and page size, with an option to view detailed results on how the page loaded, but they will be different due to the location the test is run from, and each tool’s unique methods for testing. By weighing the different results, you can get a wider perspective on how well your site is doing across a wide range of locations and scenarios.
So, how did you do? The good news is that scoring above a 70 on an eCommerce site, or above an 80 on any other site is a good result for WordPress. If you’re scoring low, you’ll need to combat some of these common slow-site problems:
The 7 Deadly Sins of a Slow WordPress Site
- Slow shared hosting
- Too Many Plugins
- Invisible Errors
- Unoptimized images
- Content loading from other URLs such as videos, scripts, ads or images
- Out of date or unoptimized theme
- Redirects
You’ll notice the speed test tools give you a summary of what you should do to speed things up. It typically includes a set of ambiguous pointers like these:
- Combine external JavaScript
- Parallelize downloads across hostnames
- Combine external CSS
- Remove query strings from static resources
- Leverage browser caching

One or more of the 7 factors listed above is usually at the heart of whatever is bogging down your site, while some indicate more complex issues with using a publishing/eCommerce platform in the first place, which we’ll get into later.
Next, we’ll explain what these things mean and what you can do about it:
Step 2: Invest in Great Hosting
Inexpensive hosting almost always leads to a slower site, with other sites on the same shared server taking up too much bandwidth or database memory impacting your site in negative ways.
Managed WordPress hosting is becoming more and more of a thing, at increasingly affordable rates. Hosts like Bluehost, Dreamhost, WPEngine, etc all offer fast and reliable hosting that is optimized specifically for sites running WordPress and WooCommerce that can improve your site speed by a huge degree.
Step 3: Evaluate Your Plugins
It is easy to get carried away with plugins, but not all plugins are created equal. The total number of plugins you use is not an obvious sign of trouble, but rather how well the plugins are coded, whether they are up to date and how much memory they use. "Bloated" plugins load duplicate or unnecessary assets, increase the number of requests made to your database and may load code in an inefficient way.
P3 Plugin Profiler is a very useful plugin for checking out your setup and identifying problems. Once activated, run the Auto Scan under Tools in your WordPress admin. You can ignore the imprint of some plugins, such as JetPack and Caching plugins, which ignore logged in users for loading some resources.
Still not sure which ones to get rid of?
- Delete plugins you’re not actively using
- Do your customers really need that falling snow animation on your web shop? Probably not.
- Ensure plugins you do use are up to date and actively developed. To check for updates on free plugins, visit Dashboard > Updates in your WordPress admin. If the plugin has not been tested for the current version of WordPress or has a last-updated date of 2 years ago, replace it with a better one.
Step 4: Stay Updated
Most WordPress hosting includes an automatic updates option or a bundled service like ManagWP to help you keep WordPress updated, but if you see a notification in your WordPress admin to update, don’t hesitate! Most updates can be done under Dashboard > Updates in your WordPress Admin.
Keep Your Theme Updated
Themify releases frequent updates to continually improve performance and squash bugs that could be loading down your site. Visit the Theme Docs if you need a step by step for how to keep your theme up to date.
Step 5: Activate Caching
If you’re using WordPress Optimized hosting, chances are there is already some pretty powerful caching enabled (such as Varnish). Check with your host to better understand what performance measures are already being taken, and whether a caching plugin specifically designed for WordPress would help.
Enable GZip
At the very least, you may be able to turn on GZip Compression using your hosting control panel. By enabling Gzip compression, your visitors will get to download smaller files when browsing your site. If youre uncertain whether your site is already using this feature, run a quick gzip test at GiftOfSpeed. They also have an excellent guide to enabling Gzip on most major platforms.
Use a Plugin
When configured correctly, a caching plugin specifically designed for WordPress will increase speed for repeat visitors to your site substantially and have very low memory usage. It is important to determine if caching is already active on your server, though, as having both types of caching active at the same time can lead to trouble.
Top Rated Plugins:
- WP Rocket – both premium and free versions available and one of the most popular and effective caching plugins out there right now
- W3 Total Cache – One of the oldest caching plugins, it is compatible with a wide range of hosting environments and straightforward to configure.
- Comet Cache – Used by more than 40,000 WordPress Sites, offers a simple one-click activation and advanced options for special situations
Things to watch out for when using a caching plugin:
- If you run WooCommerce, be sure to follow the plugin’s instructions for enabling WooCommerce support. No WooCommerce support? Don’t use it. This is critical to the functionality of your customer’s shopping cart and checkout experience.
- Start with Page Cache and Minify disabled. In most cases these two options do not need to be turned on – WordPress and your theme will already handle the loading of scripts and styles in the most optimized way possible. Minifying can often cause your theme to break.
Step 6: Reduce Offsite Content
Sites running a lot of plugins will have the hardest time with CSS and Javascript overload. These two things make up a large part of the front-end of your site such as the styling, fonts, effects and animations. Things to look for are:
- Duplicate versions of jQuery scripts – plugins should be using the internal WordPress script libraries and letting WordPress decide when to load them.
- Images loading from somewhere else
While you can only affect content you add directly to your website, you can always contact plugin authors through their support links (Plugins > Add New > View Plugin Site) to ask them if there is anything they can do to reduce response times from using their product – don’t forget to let them know how much you love the plugin and want to keep using it!
To cut down on your own offsite content and plugin choices, be mindful of the following:
- Upload images and other multi-media to your Media Library or web server. Never hotlink it from somewhere else.
- Stop using ad services that cause a slowdown or make sure ads are loaded last.
- Cut down on the number of videos loading on a single page when using an off-site host like Vimeo or YouTube.
- Keep an eye on social media widgets that retrieve feeds or images and try to keep them out of your header.
Step 6: Optimize Images
Websites with a lot of graphics or photos can really struggle with load times, regardless of how well WordPress manages them. In many cases, the speed savings you gain from optimizing images are marginal and not necessary, but if you see images on your test results taking a long time, you probably need to re-process them and be more careful in the future.
To avoid images causing any problems you want to do two things:
- Optimize images to reduce their file size
- Get WordPress to help carry the load
Saving Images
When preparing images for your website, use software that can optimize for web. In Photoshop, you can find this under the Save for Web option. In most cases, saving as a .jpg at 60 quality will give you enough compression without devestating quality loss. Keep an eye on the image dimensions too – large images really don’t need to exceed 2000px wide.
Google has an excellent guide on image optimization to check out for more in-depth information.
In cases where you need image optimization to be handled on the server end, the Jetpack plugin’s Photon module is an excellent option.
Install Jetpack by going to Plugins > Add New on your WordPress Dashboard and click Install and activate the Jetpack plugin. You’ll need to connect to WordPress.com, so if you don’t have an account, you can create one for free and enjoy the other perks, like free web stats. Activate Photon under Jetpack > Settings.
Photon will host your images from WordPress.com’s content delivery network at a pleasigly fast speed. It will also compress your images on the fly and ensure an appropriately scaled image is displayed on small screens – leading to an immediate improvement on your mobile speed score.
JetPack is helpful when you have a large number of high-quality photos or graphics being displayed at large sizes, where image compression is a concern or not an option. In cases where you have a ton of existing images and don’t necessarily need them to be perectly crisp at high resolutions, the EWWW Image Optimizer plugin will help you re-process your media library, cutting your image file sizes down considerably.
Optional: Verify Server-Side Configurations
If your site still has a terrible score and you have great hosting, hardly any plugins, optimized content and an active cache, it could indicate a problem that doesn’t have much to do with you at all, but with your server, such as a configuration problem or malware infection. It is best to get in touch with your host to help diagnose and troubleshoot suspected server issues, but here is a quick checklist of things you or your helper can look for:
Extra content in your wp_config.php (such as nonces or login information from an old database server) can trigger a ton of errors which you may not be seeing on the front-end, but which will slow the site.
Server-side security or .htaccess problems can also cause slowdowns with how your URLs are read by the browser, causing redirects or 404 errors.
Your PHP configuration may need a boost. Increasing the max_input_vars to 2000, for example, helps speed up performance when in the WordPress customizer, Themify Builder or Post Editor.
If your speed tests complain about extra query strings, install the Remove Query Strings From Static Resourcesplugin to make Google much happier.
Review
The above steps are a set of timeless, simple measures you can put in place to speed up your pages on most sites. Optimizing your site will make a noticable difference in loading speed, encouraging your visitors to engage with your content more and stick around longer. If you only do one or two things listed, thats already a move in the right direction. Every little bit counts!
Run the tests on your site from time to time to stay on top of issues and see how things are improving.
Here is a quick checklist of what you need to check:
- Test and compare using online speed tools
- Get Fast Hosting
- Reduce overhead
- Optimize content
- Turn On Cache
Which steps helped you the most? Share your experiences and tips in the comments!
Neil
Excellent read!
Links were very helpful, as well as “how to” enable gzip via htaccess. Works!
Atul Mandal
Every point is important. WordPress have some slow loading problem. I have learned a lot and will apply next time. Thanks for sharing.
Pete Wright
Very handy – thanks! You mention Photon, but don’t otherwise mention the benefits of a content delivery network (CDN). That’s a little surprising, given that the page speed tools tend to make it a key recommendation. Any reason for skimming over this point?
Vail Joy
Hi Pete! I’m glad you found this useful. CDNs and the nuances of caching plugins could fill a whole post to themselves! I personally feel CDNs are a little too complicated for the average WordPress user and require setup that goes beyond the scope of this post. The important take away when working with page speed tools is that they are not considering that your site is using a platform like WordPress when making recommendations – not everything they suggest is possible or relevant. Most web hosts do offer something like Cloudflare that can help quite a bit, but you may find it impacts your admin experience negatively when you can’t see updates taking effect. Photon is a good choice as it is designed to work with how WordPress handles images more intuitively.
Pete Wright
Hi Vail – fair points, yes. It’s rarely possible to get 100% scores on those page speed tools, so “good enough” is a more practical target. As you say, external CDNs can complicate things a little, if only because file updates (as opposed to most content updates) can require visiting a second site to refresh the cache. Not that that’s difficult, but it can be easy to forget and confusing when that happens. Great article on the rest of the stuff, anyway!
Ethan
Thanks for the very useful tips, applying these techniques can really make a difference. I’m using W3 Total Cache for some of the pages, it helps a lot if you don’t have content that changes often
Tarnya Burge
Also appreciate this post. I use WP Rocket and like it. I use EWWW for image optimisation. Thanks for the information about P3 Plugin Performance.
Michelle Chavez
Thanks for sharing these tips, it’s a must read for 2017. Nowadays we can see that speed truly matters, it can make or break the conversion of a site. Who would love to see a slow loading site? No one right. And I agree with investing in great Hosting, you will not just have a good choice in spending money but you’ll save in terms of convenience and lessen your worries (which means…lesser stress on our part and on our audience).
Jay
ImageOptim is a great app for optimizing images, particularly transparent PNGs. I run all my images through that before uploading to my site. I have no idea why Adobe’s export optimization is still so abysmal after all this time. ImageReady did a far better job with exporting images, yet Adobe doesn’t seem to think it’s worth changing Photoshop. I don’t use any Adobe software at home anymore, but have to use it at work.