Getting content to center perfectly within an element and then ensuring it responds properly at different screen sizes is one of the biggest challenges that still face front-end designers. It is not that it is difficult, but because there are several ways to go about it, figuring out which method is best can be confusing. Many CSS vertical centering methods force you to write even more code to solve problems the rules create elsewhere, or need media queries to get it to work well at all screen sizes. Understanding how each method works differently and is affected by things like the HTML, browser default style rules and screen size will help you make better decisions and write better code in the long run.
In the first demo, you’ll find six primary ways of vertically centering content, and one variation to show you how the unit size you choose can make a difference, too.
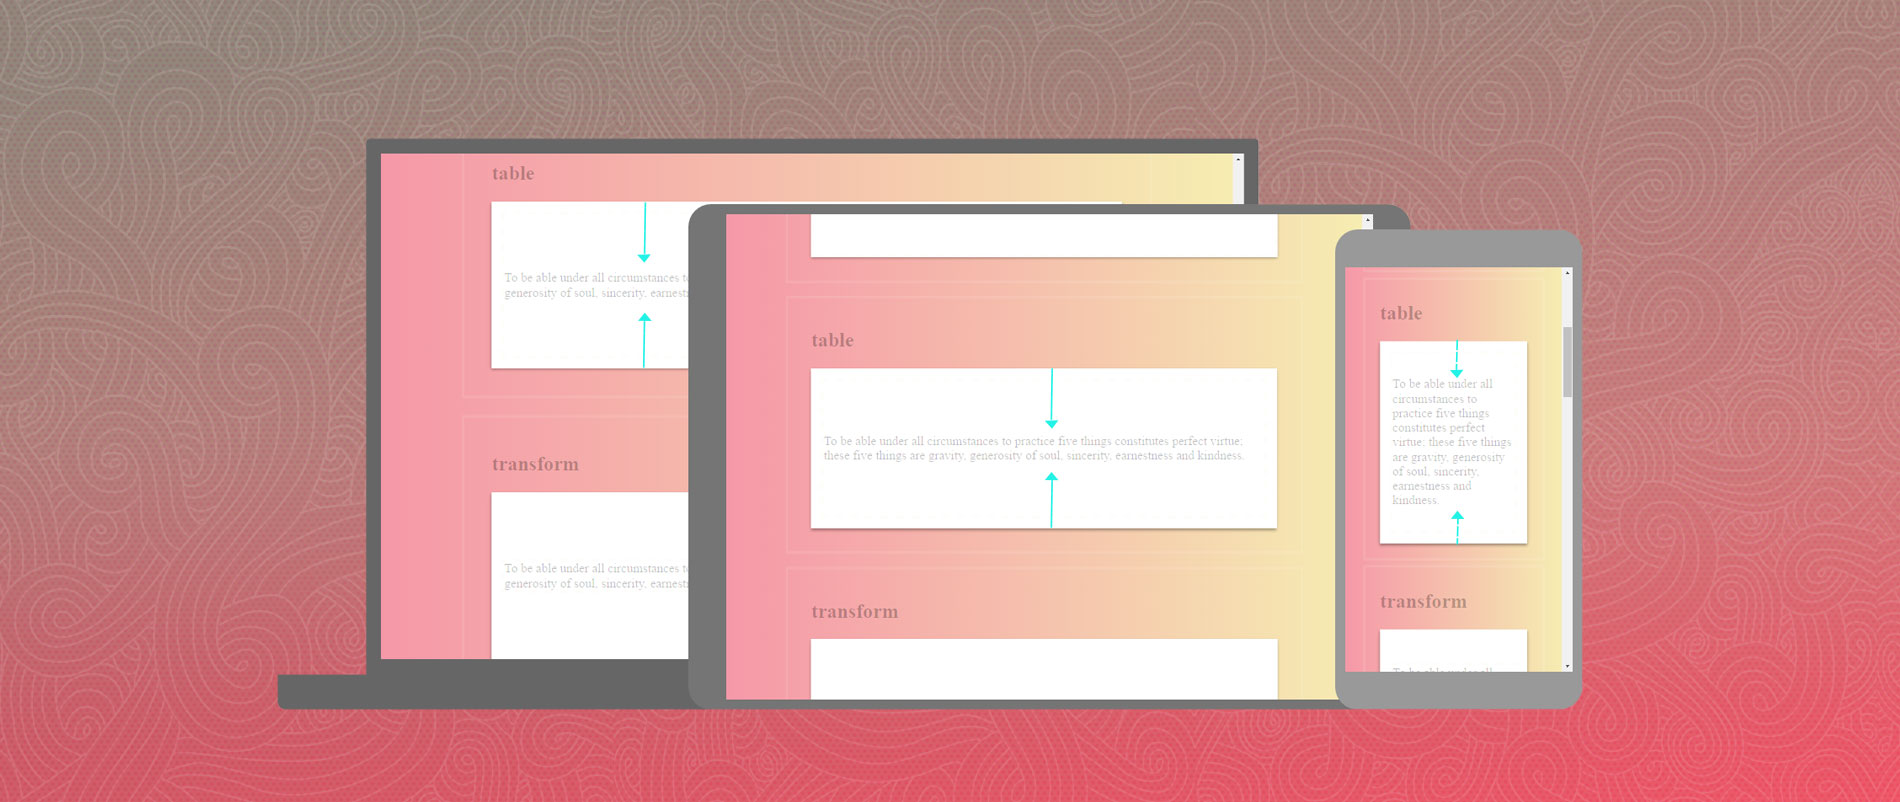
See the Pen Centering With CSS by Web Designer Wall (@vailjoy) on CodePen.27486
To begin, let’s take a look at the HTML structure we are using for the element and the content inside it:
<div class="item one">
  <p>To be able under all circumstances to practice five things
constitutes perfect virtue; these five things are gravity,
generosity of soul, sincerity, earnestness and kindness.</p>
</div>
This is pretty typical of a post excerpt on a blog page, for example. It has a content wrapper we have given a class of item and then our text inside a p element. The paragraph, or content of our item wrapper, is what we want to vertically center.
Here is the important part of the CSS rule for our item wrapper:
.item {
   min-height: 33vh;
}
To allow you to see where the text sits inside the item wrapper, we have given it a minimum height using viewport units. 33vh will calculate 33% of the screen height and adjust accordingly. In the best case scenario, you don’t need to specify a height or min-height on your elements like this because the content of the wrapper will define its height automatically.
Next, we reset the automatic padding and margins given to paragraph elements by the browser. You don’t have to do this, but it makes it a lot easier for some of the rules to perfectly center something vertically:
.item p{
  margin: 0;
  padding: 0;
}
Now let’s take a look at our options:
Absolute Positioning
The most obvious way we can place an element exactly where we want it is to use absolute positioning:
.one p{
    background-color: #eee;
    width: 80%;
    height: 80%;
    vertical-align: middle;
    position:absolute;
    top: 0;
    right: 0;
    bottom: 0;
    left: 0;
    margin: auto;
}
This method can work great for block elements and images to get them to sit exactly in the center of the item wrapper, thanks to the defined height, width and auto margin, but the problem with using this method for text elements is that the text will always begin at the top left (or top right) corner of the paragraph, so it won’t look exactly centered all the time depending on how much text there is. If your text has extra padding or margins on top, that can also throw off the position.
You get more or less the same result doing it this way:
.one p{
    position: absolute;
    top: 33%;
    right: 0;
    bottom: 0;
    left: 0;
    margin: auto;
    padding: 0 2rem;
}
As the screen width gets smaller, your text will remain anchored to that same point inside the item wrapper and will not dynamically re-position itself. Because text wraps and has varying font display sizes, we also cannot really accurately predict the height of the paragraph all the time to help this. Absolute positioning also has a major drawback – the wrapper will not be able to grow as the text column shrinks and gets taller. For this reason, this method is not the best for vertically centering anything you cannot assign a specific height and width to.
Transform
Like absolute positioning, the widely popular transform trick needs to know the height of its parent element to know how to calculate where to place itself. Unlike absolute positioning, this height can be a dynamic value such as a percentage or viewport unit.
.three{
  height: 33vh;
}
.three p{
    position: relative;
    top: 50%;
    -webkit-transform: translateY(-50%);
    -ms-transform: translateY(-50%);
    transform: translateY(-50%);
}
You might see this method combined with position: absolute, but that is not necessary – relative position here is safer. From there, the top positioning will move it down 50% from the top of the item div, and the translateY declaration will re-position it vertically back up at 50% of its height, whatever that is. This method works great if the element you are trying to center has no defined dimensions, and responds well.
Line Height
This method is best in cases where your parent element has a specific dimension and the thing you need to center has a font size, such as buttons, list items or image overlays.
.four{
  width: 4rem;
  height: 4rem;
  border-radius: 100%;
  padding: 0;
  text-align: center;
}
.four i{
  line-height: 4rem;
}
To make it even easier, we use the same units to define the height and width as we use for the font size and line height. If our element is 4rem tall (roughtly 64px), then making the content’s line height the same will ensure it sits nicely in the middle. To get it to truly center, don’t forget to text-align: center.
A few tips on using this trick:
- If your element’s content is unwrapped, ie "naked" text, you can define the line height on the parent element.
- If your content is a heading or link instead of an icon, you might have to reset any default margins or padding.
- Increasing or decreasing the content font size will simply make it grow or shrink from the middle.
Padding
If the parent element has a height, you can always center its content with equal padding. This works well on simple elements like blockquotes:
.five{
  padding: 16.5vh 8.25vh;
  text-align: center;
}
Since our item div is 33vh tall, the center point would be 16.5vh, which is applied to the top and bottom. We halve it again to get a balanced number for the left and right padding. Since vh is inherently responsive, this allows the content to grow and shrink along with the parent element.
However, this is just manually doing what CSS table will do automatically, requiring you to do less math:
Table
This is a very simple and effective method of centering content that uses the browser’s default table model display behavior, not to be confused with HTML tables!
.two{
  display: table;
}
.two p{
  display: table-cell;
  vertical-align: middle;
}
This method is beautifully responsive and will always center from the middle of your paragraph rather than the top left corner. It will also allow your item wrapper to grow or shrink as the text does depending on the screen or font size.
Flexbox
CSS flex gives us the most dynamic toolset for layout, and is the absolute best choice when you are working with more complex structures inside your parent elements or if you need to position things in ways table doesn’t do as well.
.six{
  display: flex;
  flex-direction: column;
  justify-content: center;
}
Because we have a flex-direction of column, justify-content:center is used to center things vertically. If we had a flex-direction of row, we would need align-items: center instead.
Combined With Other Elements
In this example, we have both an image and some text inside the main item wrapper. We want the image to sit next to the text block, but for the text to be centered vertically. One way to do this is with flexbox. Here is our markup:
<div class="item with-image">
   <figure><img src="http://path/to/img.jpg"></figure>
   <div class="content">
      <h3>Maybe A Title</h3>
      <p>Some text</p>
   </div>
</div>
We’ll use flex to place the figure and the content next to each other on the same row:
.with-image{
   display: flex;
   flex-direction: row;
}
We want the image to stay anchored to the top-left corner, so we use align-self on the content element only rather than align-items on the parent. This allows the image and the text block to sit in different vertical alignments.
.content{
    margin-left: 2rem;
    align-self: center;
}
What is best?
This may surprise you, but CSS table is the best option due to its simplicity and speed. In situations where you are working in complex layouts that need more flexibility, that is when flexbox can come to the rescue.
What is your experience with vertical centering and which techniques do you swear by? Share in the comments!
Sarang
Would
.item {
min-height: 33vh;
}
and
.item {
min-height: 33%;
}
be the same in this case?
kevin
well 33% is 33% from your div. 33vh is 33 of monitor height :)
Vail Joy
I just want to clarify that vh = viewport height, with the viewport being the visible area of your browser that displays the webpage – it is not the monitor height and has no direct relation to screen resolution (ie a high resolution iPad will still have a smaller viewport than your desktop monitor with the same resolution). You can see vh in action simply by resizing your browser window. You can learn more about it here:
http://www.quirksmode.org/css/units-values/viewport.html
EGiova
You will be surprised, but I have reached the same conclusions.
I suddenly feel less alone.
Merry Christmas.
Richard Djeniko
No,
.item {
min-height: 33vh;
}
Uses viewpoints
While
.item{
min-height 33% ;
}
uses percentage
Safidy
I totally agree with you.i’m happy that i am using the right option :-)
Sarang
Thanks for all the replies to the vh vs % comment.
I asked that question years ago when I was a student, and thanks to all for answering.
In retrospect, just wanted to point out that today I am a web developer at one of the leading firms in my country and you guys sure have a little contribution in that! :-) Grateful.