Did you like my previous CSS tutorial on how to create gradient text effects? I’m using the same trick to show you how to decorate your images and photo galleries without editing the source images. The trick is very simple. All you need is an extra <span> tag and apply a background image to create the overlaying effect. It is very easy and flexible — see my demos with over 20 styles, from a simple image icon to a rounded corner to a masked layer (both decorative and complex).
What Are The Benefits Of This CSS Trick?
- Saves Time — You don’t have to manually create the decorative template in Photoshop and export the individual image.
- Keeps Original Source Images — So you don’t have to worry about changing the design theme in the future.
- Very Flexible — You can have a completely different look and feel by just editing the CSS.
- It Works on Any Site — This CSS trick works on any type of site, with any image size.
- Cross-Browser CompatIble — It has passed the test on most browsers (Firefox, Safari, Opera, and even the "buggy IE6").
Basic Concept (see demo)
You need to insert an extra <span> tag within the <div> tag, with which we’ll apply a background image to create the overlaying effect. If you don’t like to have an empty span tag, you can append the span tag by Javascript (I’ll show you how later in this tutorial). Here is how it works:
Then in the CSS, the key point you have to remember is: specify the div element to position:relative and the span element to position:absolute. You can position the span element anywhere you want by using the top and left property.
IE PNG Hack
To make the transparent PNG image work on IE6, I use this wonderful iepngfix.htc hack. Download a copy of iepngfix.htc and insert the following code in between the <head> tag:
<!--[if lt IE 7]>
<style type="text/css">

  .photo span { behavior: url(iepngfix.htc); }

</style>
<![endif]-->
Look and Feel
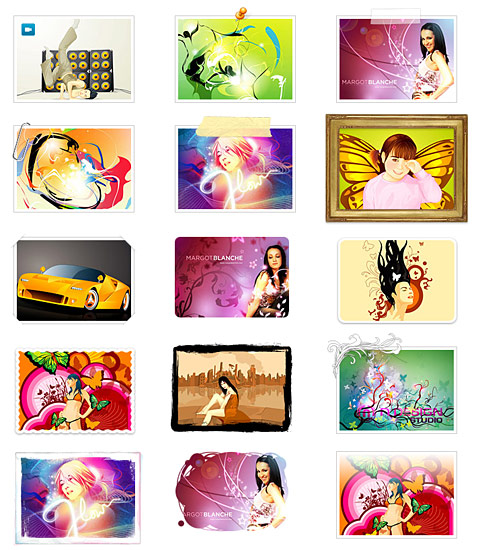
To change the look and feel, simply edit the CSS specifications of the span element. Click the image below to see the demos I have. To show you how flexible it is, I’ve created 15 different styles (notice the HTML markup is same).
The jQuery Solution (see demo)
I know some of you (particularly the web accessibility fans) don’t like to have an empty span tag in the markup. Well, I’ve solved this issue by using jQuery to append the span tag to the source code. Insert the following code in between the <head> tag:
<script type="text/javascript" src="jquery.js"></script>
<script type="text/javascript">
$(document).ready(function(){

  //prepend span tag
  $(".photo a").prepend("<span></span>");

});
</script>
#1. Simple Gallery (see demo)
Let’s take the technique from the previous step and apply it to create a photo gallery.
#1b. Mini Icons (see demo)
This example shows you how to position different icons on top of each photo (note: an extra CSS class name is required in the span tag).

#2. Photo With Text (see demo)
This example shows you how to create a gallery with linking text (em tag).

#2b. Popup Text (see demo)
#3. Mini Paper Clip (see demo)

#4. Cork Board Gallery (see demo, IE6 version)
sIFR Version (Flash Text Replacement) (see sIFR demo)
This example uses sIFR to replace the em text with a handwritten font (notes: in this demo, the span tag is appended by jQuery)
#4b. Cork Board With Masking Tape (see demo, IE6 version)

#5. Art Gallery – Black Frame (see demo)
#5b. Art Gallery – Gold Frame (see demo)

#6. Grungy Watercolor (see demo)
sIFR Version (see sIFR demo)

#7. Glossy Style (see demo)
#8. Wood Panel Gallery (see demo)
Finally, this example demonstrates how you can apply the background image to all elements to create a wood panel gallery: ul, li, and em.
Final Remarks
As you can see, this CSS trick is very flexible. So, be creative! Feel free to incorporate the graphic images and CSS styles in this tutorial to create your own.
SpinX
Really great tutorial, just what I needed for my next project.
Todd
Very nice tutorial! Such a simple technique, but it makes a huge difference.
David Couillard
Really nice stuff man! Thanks for sharing these ideas and info… I’ll definitely use this technique…
Caesar
Wow. excellent tutorial, great variety of styles, and so easy.
Jon Hughes
I’m one of those that are opposed to the empty element, and I don’t think embedded JavaScript is the answer :) But it’s a very nice tutorial – thanks!
Sean
Wow, really cool effect. Thanks for this one.
Jerlyn Thomas
Fabulous! Great tutorial, will definitely use.
Shortshire
That is a great tutorial. I will probably start using techniques like that for some of my photos. Thank you and the presentation is easy to follow.
Eric-from-Boston
nice tutorial… i haven’t yet jumped into using PNGs yet, didnt know much about their compatibility and I knew there would probably be a hack to fix it….gotta love those hacks…PNGs may now come into my workflow.
thanks.
Diego
your examples are best thanks
Ken Nickless
How simple! And no need to modify the source image.Great tip.You always come up with the goods. Thanks
Gilbert
Wow. Really nice Nick. Keep up the great work.
Bedrich
Very useful tips, thanks!
Marianne
Great tutorial. I will use this for my next project!
Keep up the good work. I love your site!
Maicon
really good!
Miiitch
This is a great tutorial!
Would is be possible to do a tutorial on how you made all those span images? The tape, the pin, the frame, etc.?
That would be epic! Thanks.
Travis
Before with one of my project, I was required to made a frame around a photo slideshow, so I put a PNG as a frame (with transparent center) on top of the photos. It looks perfect in FF and IE7, however I can not get it work in IE6 even with PNG fix (js stype).
So I end up using 4 GIFs wrapper around the photo, looks the same but not as code-friendly.
I might try out your method of IE PNG fix to see if this can be THE ONE! o_0
great tutorial, always enjoys it =)
Daniel Holter
Wow, really really top notch tutorial, man. Just like all great tuts I read, you make me want to go redesign my whole site right now using this effect. :)
Thanks!
The Frosty
Wow thats awesome, I am going to think of something I can use that for!
Emilio (Brazilian)
But this is semantics? Use span this way is semantic?
Allen
I really like this blog, very helpful.
The tips awesome !
Majesticskull
Really nice! I love! Thanks for the great solution! Nice, nice, nice!
mcm69
An excellent trick, thanks.
Regarding semantic value – I don’t really understand how the hell an empty span can do anything bad. If you have no CSS (like, you are Googlebot), you don’t see it.
Fabian
Very nice tutotorial! Dugg ;)
D. Carreira
Thanks for sharing this! Great!
Daniel
Great work! Common techniques, combined to stunning results!
Naki
Great Tutorial! It gives lots of ideas, thanks ^^
Pavel Ciorici
Good work Nick!
Andris
Very creative idea! I like it, thanks!
– Andris
Bram
Very, very handy trick! Thanks!
Bruce Alrighty
Nice job. I am work on a new project and I think this will be very useful.
shabith ishan
two thumbs up nick!!! :P
Carlos Leopoldo
Very useful, but it don’t protect the images when you want to add a watermark of copyright ;-)
David
I’ve done something similiar for the site italian-furniture.it but this solution is much better! Great work!
Mick
Great stuff, only your pop up demo doesn’t work in IE6.. the problem is none of the png fixes out there can make png images hover. If anyone knows one that does, please comment.
Greets Mick
linzprod
Very nice idea. Keep up the good work.
Tom
Great work, and thanks for the accessible solution: very nice.
lex
omg! thank a lot men, i only have one doubt. how did you make that Polaroid texture? ( i mean, the shadows in the paper. photoshop?)
m4c
Great! Thx!
Christina
I love this! I really like the design that has ‘photo corners’, I will definitely be refering back to this tutorial A LOT!
Tommy_Gun
WOW… this is beautiful thanx.
Paul
Great work!
Cleo Morgause
Great tutorial and a trick basic.
Congratulations!
Claudia Snell
This is a great tutorial. I’ll be using this right away. Nicely done. And thank you for all the variations, especially the accessibility option. Fantastic!
M.Mahgoub
Thanks for the tut man. and for the PNGs.
Josh
Terrific tutorial. Thanks!
Kurt Cruse
The beauty of this is that it’s so simple but so effective, the mark of a true creative. Thanks for sharing your insight.
Michael Paul da Rosa
Excellent!!! Thanks for sharing!!!!!!!!
Spanna
Oh my goodness. You are amazing. For so long I have been looking for something like this. I have put off making myself a new online portfolio for a couple of years just because I know how long it takes to format and export all those images… and with my tendency to get bored of my interface designs quite quickly I know I am just going to have to do it all again in no time.
Thankyou so much! This is one of the best tutorials I have ever seen.
Graham Strong
Great tutorial! I love how fast the hover graphics activate as well — very slick gallery!
~Graham
Javier Tapia
Notable tutorial. ¡¡Muchas gracias!!
Radek K.
Nice tutorial.
Drupal Museum
Thanks for the tutorial.
D.A.T.
Nice. Thanks
Pedro Rogério
Wowwwwwwwww, very good tips!!!
ed
how elegant and simple. will definitely use this technique!
Christian Mejia
Holy Cow! This is great! Thank you for posting this, now I need to get to work!
Vrungel
Thanks for tip, nice and simple!
It helped me achieve desired look of banner image. Although I ended up using nested tags rather then extra tag but the idea was the same.
revy
I love the IE png fix. I haven’t seen that before. I will probably give that a try.
m4rc0
WoW! Great tutorial! Thanks, thanks, thanks! :)
Domo
Wow, amazing! I’m sure i’m going to use it in my next work. Thanks!
Tor Løvskogen Bollingmo
Nick, have you had any luck getting the PNG-fix to work when you are repeating background-images (PNGs)? That’s what all the solutions, and this behaviour lacks. Is there a solution?
Luca
Cool Cool COOL!!!
gen
wow thanks a lot Nick! this is amazing! I going to try and rework my gallery to use this technique.
Kynes
This ‘trick’ is similar to the one you used in ‘Advanced CSS Menu’, but it’s still so genius ! I just love this simple css trick and I’m always thinking to it when I see lines & lines of JavaScript for the same result (and not always with the same compatibility :D) Thank you for sharing all your knowledge, and for the quality of your posts.
PS : By the way, I would be interested in knowing how you’re doing this ‘Comment Preview’ ^^
PS 2 : Sorry for my English, I’m French :/
tim
Thanks! I had been planning to do this to a site I designed–now I don’t even need to think about how. :)
Eric
does anyone know if this technique works in html emails?
Benjamin Butgusaim
Hot diggety, that is some phenomenal work there, lou!
Aaron Mills
Hey I love this.. great work.. thanks!
Panther
Whoa! Not only did you show me how to do a trick I’ve been plotting in my head, you also fixed the annoyance of IE6’s PNG problem. Thanks for this double whammy of an article, cheers!
veerendra
hi
this is just amazing and inspiring tutorial .. thank you very much !
Nouman Saleem
so helpful! Thanks for this, I will really be using it :)
Louie
This is awesome tutorial. We don’t need to edit the image. Thanks for this :)
Joefrey Mahusay
I will use this techniques soon. Thanks a lot :)
Roland
Thx for this great idea, I love it. It is really flexible.
Antoine
Wow, this is great stuff!!
Bookmarked at the moment ‘cos I’m at work but I’ll check that as soon as I get home !!
Thanks a lot !!
Jay Salvat
I use the same kind of effect and technic on my new website for a couple of week. http://www.jaysalvat.com/. Glad to see the same idea here.
Gaia Bonetti
Really Amazing tutorial, thanks!!!!!!!!!!! :D
InvisAble drummer
Thanks this is great, please do more of these!!!
bbx
The possibilities of this trick are unbelievable. I really love the design and flexibility of it.
Jcxnet
That’s amazing !! maybe I would use it in my future projects, what kind of license have it?
SARAH
wow…Great tricks. I am going to try this. Thanks for sharing
albert lumu
This is astounding!
Thanks!!!
Vipul
Great work…. Its really gonna help me in my new website… Thanks for sharing :)
brian
Beautiful tutorial, great examples. I’ve been looking for a way to do such an effect. Thanks. =)
Arcadio
Wow … amazing….
Felipe
this is great!!!!
I wish you could post tutorials more often.
APM Solutions
Great tutorial. I can see this being used a great deal. Thanks.
Stacey Star
Wow! I’m just starting out and looking for all sorts of tutorials. This one is amazing. And you write so that it makes sense. Thanks for that!!! Please keep these coming.
Atakan
Amazing!
This is the real proof of the what you are able to do in CSS is boundaried with your imagination.
jarreweb
how to work with it if there are different images size on a page ?
for example, i’m working on a portal website and our clients send us pictures with many many different size (width and heigh)
thanks
Real Estate Graphic Design
wow nick, you amaze me again with such forward thinking.
Bel Koo
How’s wonderful work~ thanks for sharing!
Lance
Simple yet enough to make me nod and say… “aha!” :)
Kevin Kashou
Hi Nick,
I implemented the png hack and it works really well with background images but for images that are on the page itself; it displays a box with an x on it. What could be the cause for that?
Ricardo
Great tutorial with nice examples.
TmiY
Great post!
Very useful and good to know that we can use this with IE6 safely.
Thanks!
ocube
I am just about to start on a web portfolio for a friend and this will surely come in handy. Thanks alot for this, your site has always been an inspiration. Keep up the good work
dbernal31
Muchas graxias muy buena esta web
Strike
Great tutorial! Thanks a lot!
gen
wow! thanks a lot for this tutorial Nick. I really found this helpful and will try it out on my site soon.
Richard@Home
Gorgeous, simple gorgeous :-)
Alex
My god your slick! Thanks for another excellent tutorial.
rruben
UberCool!!! Thanks for the great tips again. You really bring live to what css is.
Betovarg
Man I love this website
PP
The best tutorial I have ever seen! Appreciate your sharing and time~
KEISYUU∞
It’s so great, and cool. I love it.
Vlad
Thanks!
The article is really great and helpful.
I have one question…
I tried to use the IE hack in the past, but it never worked, could you please explain the code you use? why is there [if lt IE 7] if the hack is for IE 6? (7 works fine with pngs)
Thanks
Tanju YILDIZ
Thanks, great tutorial.
Çetin Oğuz
Great tutorial! Thanks a lot!
JT
Wow… Simple, flexible, effective, wonderful. Thank you!
knight online
Thanxxx
Roy
So Great!
Thank You!
bweb
Thanks man.
digitalscrap.net
I think I may be living on this site! Where can I sleep for the nite? :)
Bacardo
Very useful, clear and clever. thanks for share!
Regards from Argentina!
Bacardo.
CSS 2.0 Experts
Really innovative tutorials for CSS 2.0 experts…!
JamieO
@Vlad – The ‘lt’ in [if lt IE 7] stands for ‘if less than IE7’ meaning it will apply the changes to any version of IE lower than 7.
I agree that this tutorial is fantastic. I’ve done similar things on a few other sites, but the variety and simplistic implementation speaks volumes to your talents.
The biggest challenge one faces when using a visual style of this nature is to ensure that your thumbnails or photographs are all the exact same dimension. Another option would be to have 3 specific sets of dimensioned frames for square, tall rectangles and wide rectangles which get applied based on a class on the span.
To keep things simple from a code / content point of view, you could apply the class to the image itself in your content editor / CMS, and use a similar jQuery Solution to inspect and remove the class from the image, then apply it to the span to produce the matching frame.
Posicionamiento Web
Fantastic!
Thanks for sharing your knowledge !!!
Cheers
David
Absolutely brilliant!
Nice work once again
silva
Del putas
plakali esanjor
looks very good
Antoine
This is GREAT stuff!
Just checked a few things at home and I think I’ll use this to automatically apply style to pictures in my blog posts!!
Thanks a lot again!
Alis
Great job, this gallery will be really useful for my artfolio!
This is really great!
Btw… it would be great to have also a javascript like lightbox to see the image but with a description included.
NGP
Hey! Awesome tutorial once again, will be very useful in the work I am doing right now. I just wanted to point something out. Under the “Basic Concept” header where the initial bit of CSS code is with the photo beside it, the test is not selectable for cutting and pasting. (I’m using Safari 3.1.1 (525.17) for PC.) Just makes it harder to follow along with the tut because of switching back and forth to copy the type.
Thanks for an awesome site, I always look forward to updates
NGP
Caleb
Wow, what a little CSS love can do to brighten up a page! Great job once again, I’m already adding this effect to my site :).
caocao
good !
resun
very good and useful,thanks:)
manhkhanh
looks very good
Phillipe Calmet
Great work there. :D
Looks very good and quite easy to apply…
kicek_
great job man.
looks very nice.
Sophia
Thanks, love ur site !!
Jonas
Thanks a lot for this great job!
Camilo
Great galleries!! Really impresive. Thanks for sharing!!
Salvatore
big deal, I’ve done that for years! :D
Robbi
@Salvatore: Yep, but I doubt you’ve done it as good xD
Sebastian
Wow, great tutorial. Really impresive :-) Thanx a LOT!!!
Cody
Great post!!! extremely useful.
Salvatore
@Robbi: probably not in terms of applied design, but the code is just that, it couldn’t be any different/harder/easier. It’s just common css. Good to see people shares stuff like this anyway.
senem
thanks great galleries…very nice:)
Jorre
too bad this isn’t working on IE6. Ok, it shows up alright, but hovering isn’t working. Thanks for the great tutorial though!
twotwo
Great tutorial! I’ll use it on my websites!
Patsy
Once again, a great tutorial!
karl
Instead of the htc hack I’m using the filter:progid:DXImageTransform.Microsoft.AlphaImageLoader(); in css
imaginepaolo
Great, great!
bybash
thanks buddy,really useful article.
James Bakdwin
Very clever and impressive stuff! Will certainly be trying this out on a future project.
hediej
can it be done if the ‘span’ image is a transparent .gif instead of .png?
Web Design Hobart
Great little tip and very usefull to create some image overlays.
Bleyder
Great and helpful inspiration!!
Erik de Vreede
Way to go with the website man! it’s rocking.
Zeb
Wow I’m looking for a kind of gallery, thanks Nick !!
Photo Gallery
Cool CSS effects…!
andrew
the code is not validated when using the jquery script in the head section
ifx
Hi, technique of using shadows/gradients thru 24bit transparent png with changing colors under png is also nice way how to use htc script. Alternative script for use could be this one: http://www.maptales.com/styles/default/css/pngBehaviour/pngbehavior.html
But both of these scripts doesn’t work with background position and IE 5.5 and lower are out (but who cares about win 98 users these days? Someone with conditional comments). And when I tried to “rendering by htc” all pngs on page, it seems like “flicker” to me in IE…
Thanks for handy article with beautiful examples! ♥
Giuseppe
Thanks a lot for this tutorial-That’s a nice sharing!
ffranz
Great beautiful decorations, and interesting tutorial!
You are a great master…
Welcome to Paradise
This is an impressive css photo gallery. Thanks for sharing this. The results are just awesome. Cheers.
teles
Thanks a lot for this tutorial, very nice !!
taylan
This is very cleverly. Thank you for sharing.
Hiren Mehta
Cool gallery:)
lynsey
Thanks for this! it’s really useful!
狂舞网络
Thanks a lot for this tutorial-That’s a nice sharing!
Brian
I have been waiting for this tutorial for five years! You are AMAZING! Thank you.
Nick
Very cool! This technique will come in very handy. Thank you!
LifeSucks
Hy! Sometimes your life sucks?
Visit my website & submit your own stories! Have fun! / http://www.life-sucks.tk
Bye
slayaz
Awesome! Not only are your illustrations utterly amazing, but your CSS is l33t as well.
I want to be you!
I now feel completely inadequate…
Orkan
Very useful thanks for this tutorial.
naran_ho
mmmmm, really useful, thanks nice work
Peter
Why do you need the span? If it causes problems and you need to use a javascript to correct it would it not be better to put the image itself in there?
.photo {position:relative; width:180px; height:130px; margin:20px;}

.photo img {border:none;}

.photo .pin {position:absolute; z-index:2; width:28px; height:21px; top:-12px; left:90px;}
Slightly change your html
Of course you would need to change the IE conditioner
.pin { behavior: url(iepngfix.htc); }
This way you do not neet to include the jQuery Solution
Great article as always, it is a very useful tecnique and has multiple application fields. I recently designed a shopping cart with the product photos inside a heart.
Peter
Sorry about that, the html is something like this:
Peter
I’m sorry about all the posts, the preview shows up fine but it removes the html even in the code tags…
Peter
I can’t get this to work so I uploaded it and here is a link:
http://www.peweedesign.com/embarrasing.htm
Luke
Good tip Peter, that should validate now. Nice one :)
Adeyemi Babatunde
This is too good to be true. Thanks for the being a source of inspiration. Though I’ve been putting it to use even before reading your write-up, mine has never been this beautiful. Thanks
Graham
Wow once again you’ve shared an incredible tutorial – thanks!
I’ll definitely be using some of these methods soon.
Julie
Very nice. Thank you
Web 2.0 Designs
Awesome designs on this site…:)
Paul Palmer
Wow, this is a great resource. I’ve tinkered with this effect in the past, but never to this extent.
guest
the thumbnails itself are interesting. what kind of art/technique are they called anyway? thanks
Cathy | Mommy Motivation
Thisi s so very awesome! Thank you for sharing this with us.
Guisella
This is awesome
Jenn
I was just surfing and ran across your site! Great info tutorials! Thanks!
John Brown / Free Online Games
Thanks!! This is awesome…
Ploocky Youth
OH MY GOD!
This is perfect! I cant believe it :Q
You are awesome Congratulations!
Code It Red
Love the effects. I am a huge fan of this kind of stuff and CSS is one of the main languages that I focus on today. I will of course be using these methods in my coming projects.
Ryan
Awesome, I will use it on my graphics blog, infact the effects and stuff here is inspiring me to again as much as I can. Thanks
Matthew Johnson
Well done as always, this is really great inspirational material and very useful as well. Keep up the great work!
Zamotin Dmitry
This Goooooood! Super! Thanks! This cool tutorials!
Dmitry (Russia)
This cool tutorials))))!!!!
Lisa Noble
Wow. Thank you so much. I love your site. It is sooooo vibrant and I learn something everytime time I come back.
Quality Designs
Great work!…world class quality designs.
JM
Very nice tutorial! Just one question though: I would like to use slightly larger picture frames- where would one be able to find some? Did you create these ones yourself?
Thanks!
gilda
hello! i just surfed onto this website and i’m so in awe. i want to learn so many things to use on my blog (which i was so proud of but now i look at this and i feel sh*tty). i know zilch about css but i’m so inspired by everything here!! it looks great and hopefully one day i could use these. i mean of course if i had the money i would love to hire you guys, but this poor college student will just have to diy!!
William Li
Great work,
I’ve done something similar on my site where the date tag sits over the main image. Using absolutes has been a godsend in CSS and allow much more freedom for the web designer.
Peter
FF3 doesn’t work. How to fix it.
Skyte Media
I’ve been looking everywhere for a place that describes how to add border gradients using CSS. Thanks!
Visit us at http://www.skytemedia.com
kimboa
good!
2clicks
EXXXXXXXXXXXCELLENT, MAN! THANKS!
kaffy
i love it!!
that’s very cool!!!!
thank you so much for having such great tutorial!!!
Pure CSS Layouts
Nice tutorials for CSS Layouts on site for designers!
panoRmo
Really nice trick, very useful!
Thanks!
bluevn
Wow, ur website is great ! Many things r interesting ! ^^ Thanks
Danish
Amazing work…….Outstanding designs and well written tutorials…Thank you so much sharing it and hope you keep coming up with gr8 stuff like this
Peter E.
Wow…very interesting!!!!! Thanks…I’m from Cuba, my english is not so good…but a like much this page!!!! thanks again
Al
Fantastic. Nice post and excelent blog! Congratulations.
satty
y dont u give all information about how made effects in photoshop?
Deepak Shakya
Wonderful stuff….thanks…keep up the good work
Else
Great.
I really like this page.
zheung
perfect! I got the main background image! thanks
Quality Designs
Nice article!
But we need to find some simple solution for all browser/OS.
Michele Valongo
Puts! Muito Irado! (expressions in Portuguese that shows surprise. Ex: Wow!)
Your blog is very interesting and useful for us webdesigners.
Congratulations!
oyuncu
thnks from turkey
Guillaume
Very nice gallery. I used to make my frame borders with photoshop tuning every picture but it’s much more easier this way.
Thank you for all these neat tips, keep posting :)
Very nice blog!
Mukesh gupta
Its is good to the fond of using css for make your site attractive
Raj
useful tutorial m8. Thanx!
Manu
Very nice gallery…really thanks.
And very nice blog.
free online articles
I’ve been meaning to learn more about CSS, and your post has helped me a lot.
Cheers,
Sam
shoutree
Thanks, It’s a coooool artcle.
Yëco
One of the best css tutorials I see since a lot of time ago.
Thanx
tunkmay
Your site very beautiful. I like it very much. Thank alot for your tips.
Search Scripts
This is perfect example of a fully CSS based photo gallery. I wish all web designers could have the creativity like you.
Flash Photo Gallery
This is really nice. Thanks buddy!
Stephanie
Thanks so much for this, I’m currently redesigning my portfolio–creating some of these will surely save me lots of time, and really opens the window for creativity!
IT services in india
I lov this gallery… Thanks!
amit sinha
really a great work. An awesome design. I am going to explore some of them to my students. Thanks buddy.
best web design
Again nice post!
Consistently giving great tips for web developers…Thanks!
Sandra
that is great! thank you so much! =)
i’ll try it out definitely!
trCreative Web Design
Fantastic set of techniques – bookmarked for future use – thanks!
Jan Hafner
you can simply add a “nbsp;” between the span tags to create valid xhtml :-)
Christopher Anderton
Very very nice. Been looking for something like this. Now i wonder how to implement this to WordPress (Thumbs on pics uploaded).
ter10n
this real c00l :P
Lorenzo Ahmadi
I dont know what I would do without you. Keep up the good work and thank you for making my life easier :)
ipei
thank you so much for your tutorial! love your website too, sure i bookmark this site.
hd
Thank you so much *_*
lokendra
i like it cool u can see more
Thiago
Eu tenho uma pergunta, para que serve a tag “em”?
Ray
Very interactive and usefull tutorial, thanks for sharring.
Wendy
Can this be adapted for a set of images that have different sizes, and the size is not known until it is grabbed off the server?
Great tutorial btw.
Renzo
Excelent. Its very usefull and nice.
RaphaelDDL
Hello :D
I mixed 2 kinds of gallery (the one with glassy effect and the one with the gray/orange description).
The visual is awesome but, even i tried using clear:both in the div below the gallery, the li’s still are floating and getting in the way of the lower div O.o
What should i do?
Thank you.
Boda
Sorprendente.
Me encanta este sitio web siempre esta lleno de nuevos recursos para poder innovar con las tecnicas para diseño.
Gracias.
Sam
I know that IE is of the devil, but you can’t use transparent png files because the transparent part of them turns white which would block out the picture. Just a concern. I know it’ll work on Fire Fox and Safari, the two best browsers ever.
Raphael DDL
Sam, in the tuto he uses pngfix.htc to fix that error in IE6 so, works with it too
Rich
Thank you very much… Perhaps you can take a look at our FTP solution and provide us with some feedback: http://www.singlewrench.com
gaston.alegre
This article is just great, I’ve used it on my home page. Thank you so much.
Gray Ayer
Way to go Nick. Always pushing the boundaries of CSS.
Jeremy
Thank you for sharing this wonderful technique! I am using the mini paper clip theme to display a photo gallery on my company’s intranet, and it is working very well.
Term Papers Writer
I really like Simple Gallery and Mini Icons. Shows that a lot of work has been put into this. Very different from traditional work. Can you we have more of these? :D
feha
I just can say WOW, was thinking about this, but now is here :-)
Thank You very much.
Justin
nice ….. good job dude …. keep on the good work :)
Ritwik
I need a solution that how could I make the backround such as your? Your design is excellent
Patrícia Anzanello
Wonderful! Do you know if this can be used in Blogger? I was thinking in using it to decorate each post photo. Didn’t work yet. I’ll keep trying!
Thank you!
website design
great tutorial. I learned something today. Thank you.
Fred
Very nice.
What about then you have landscape and portrait images mixed together?
CSS Model
Thanks for such a great technique! It is really a wonderful idea.
darlet
does this work on multiply? its cool..
shalini
i’ve just started to learn CSS. can anyone tell me how to apply the round-corner.png to an image of size 50×50.do i have to make another png with the desired size?? apologize for the trivial question.
awesome trick btw!
shalini
Oh and i was talking about the 8th style in the 15 different styles…
Brandon
hmmm, this is actually pretty hot. Lately I’m a big fan of quick-tricks for galleries and stuff (I’ve been messing with some of the cool flash driven stuff out there), but I’ve always had a soft spot for good clean css based galleries. nice post – thanks for sharing it.
Zeytin
Great tutorial.Thank you.
QQ
it cool……
fedmich
Very nice :)
Thank you for sharing this
Nimol
Thank for guiding us!
(“,)
polaris
Very nice.
David
Thanks! Much less boring than the usual galleries.
Knoxville Website Design
Wow, even looks great in IE6. Nice handy resource not only for great looking galleries but also for a png fix that works how they say it should.
Willem de wijs
Love it. Thanks
i’m checking it out.
Willem
the Netherlands
Phyu Mon
Cool! I’m just starting to learn about web design and CSS. Can u recommend me about websites that I should visit?
onecss.com
amazing stuff..
Nev
These are simply great!!!! Thanks a lot.
Dave Ellis
Great tip – really useful!
Tenika
Thank you very much of this tutorial! I will be using this.
snipe
These are amazing – thank you so much!
chethan
Oh wow nice one.. please could you see my website if i could change it to make a gallery using those codes above?
arga
Okey, I’II try it. I am beginer and sorry I can’t good speak english. I am come from Indonesia
Andrew
lovely stuff..Thanks a lot!!!
TomGerry
Love it. Thanks
i’m checking it out.
Willem
the Netherlands
blogger
Cool! I’m just starting to learn about web design and CSS. Can u recommend me about websites that I should visit?
Rahim Haji
My name is Rahim and I own a design and development consultancy in Enfield, London. We would like our site to be added to your gallery because its clean, standards compliant, great use of css and jquery as well as degrading gracefully.
Therefore, we would appreciate it if we were featured on your site so visitors can make comments and let us know their views on the design.
Regards,
Rahim
Gene D
Very nice! Simple markup with a great effect!
Shirley
Excelent Tutorial! i’d like to use it in some of my pages =)
It’s really nice ^^
Thanks!!
Kari
Can this be used to layer a png over a .swf file?
Berat
very nice… thank you :)
Brendon
Great trick and very interesting article. Thanks for sharing it with all of us…
Friend
Awesome illustration skills!!
MSOnWired
These are great illustrations. I love the use of color.
web-d
I’ve been looking for a tutorial like this, and couldnt hope for a better one! every thing I need!
thank you very much!
Alanya
Another great post from this page, thank you!
Andy
Wow, this is awesome. Just to let you know I’ve used one of the examples for my gallery on my website. Really amazing work and it has inspired me to experiment with CSS to test its power.
Gggreat
Great tutorial! Thanks alot !
Sunil Shrestha
Tutorial is great!
alma
como lo habro no puedo
al descargar no se puede ejecutar
Exdizajn
This gallery rockz!
Media Influence
wow this is great. thanks for sharing
Lawrence @ Furious Photographres
Calling this awesome is an understatement!
Bartek
great tutorail, thx!
i’ll use it on my page
mark Ole Barner
a video tutorial on vimeo or something would be totally cool!
Eray USTA
Nice tutorial thanks
costudio
this is so cool! thanks a lot.
Steph
So I may be the billionth person commenting — THIS IS AMAZING! Thanks for sharing, this will come in handy with my new look :)
Diego
Im glad Ie finally handles pngs properly, it used to be a real hinderance, good tutorial matey !
Diego
http://www.corporatewebsolutions.net
MraxL
Amazing!! nice tutorial..
webtechnepal
Thank you so much. Now I can use on my web works. Thanks.
new
actualy i download the files but i dont know where to start
i have a site using impressCMS
Jen Tank
hello, I created rollovers for my image gallery at jentank.com using this method, but the span image is showing up under the thumbnail image in ie7. Does anyone know why this would happen? IE seems to be interpreting the ‘top’ class differently than firefox and safari.
Digital Photography
Your way of explaining the use of css allow me to really grasp the concepts. Thanks
Carlos Hermoso
Good post. Thanks for this tutorial
Arif
Thanks a lot for the nice article.
As I’m a novice I wanna know how can I manage Images and Image Frames that have Dynamic sizes ?!
Thanks anyway
Joomlapanel
Never seen like this before.. very excellence CSS tips
Jorge
First i will thank you for your blog! It’s very helpful!
I’ve followed this tutorial but my pictures have an ugly blue frame. I’ve tried with
.photo a:link {text-decoration:none}
but it doesn’t work…
How can I remove this frame?
Thanks again
Herramientas blog
cool job, very cool job people
bebo music skins
great stuff, ive been looking how to do this for ages, thanks
mike
Can you provide the full php file for the templates. I am not getting how to make them at all.
Thanks!
Mellick
This is Brilliant, I have been looking for something like this for ages for my members site. I have one problem with it for use on my site, maybe someone can suggest a fix. I want to use it to display user thumbnails which are all the same width of 130px which is no problem but they are not all the same height. I would like to set the image frame to display the top 100px of the image but clip anything below that as this peaks out from behind the frame. I don’t want to set image height as this will distort the images. I have tried setting the css for li to a height of 100 with overflow hidden but this cuts off the bottom of the frame. A few other things I have tried have been just as unsuccessful.
Anyone got any suggestions?
BTW I stumbled upon this site by accident and just love it
st.killian
so cool !!
publicitate online
Very nice work, good job!
Markus
Can somebody post a good way to get the black brush-border for all sizes?
I had a try, but im not sure, if this way is really ok. I took the background-image from the span and placed it as a real img in the span. I adapt the brush-border image size and the padding to the image size automatically by PHP so that it fits.
albertto
Awesome !!! Thanks for share.
if(woman){
write “I love you”
}else{
write “best regards”
}
:)
Ahmad Esmaeilzadeh
I used it with my design,
here : http://www.shomalgan.com/blog/2008/12/11/portfolio-page-and-nextgen-gallery/
chuhe
good good, very nice, thanks….
Arafat Rahman
Wow! Nice
gradina
This is really nice. Thanks buddy!
aşk
nice.. good jop
islo
very very nice
Trevor Saint
Remarkable, yet simple. Thanks for all your site tutorials, tips and tricks. Bookmarked.
Chris Raymond
Very nice–but what happens if your images are not all the same height or aspect ratio? I’m thinking, for instance, the example with the photo corners. I’m designing something where the featured photo will change on a regular basis and may not have the same aspect ratio all the time.
gardenia
this is really nice
Russ
I am trying to integrate this into my WordPress site with the NextGen Gallery plugin. For the most part, it works. Some instructions were updated here to get your CSS code to work with it here: http://alexrabe.boelinger.com/2008/11/25/new-in-version-100-templates/ however I notice that in IE it displays properly, but in Firefox, it shows BULLETS for the LI. How can this be fixed?
Pieter
@Russ:
Use
ul{
list-style-type: none;
}
in your CSS file :)
This should work.
Frankie
Thanks. Evething is OK, but 2b can’t working the in IE6.
Frankie
Thanks. Everything is OK, but 2b can’t working the in IE6.
elham
thanks.very very nice
Peter
This is awesome! Thank You!
@BrentwGraham
Why isn’t this just written as a WordPress plugin that re-writes the correct .php & .html files?
This would be a huge success as a WP plugin.
sam
i like it
dele
This is absolutely crafty!! I was about going the PHP+GD library way. When i found a post that led me here. This sure cuts down server overhead big time!!
Thanks for this resourceful past
sivas
very good, thanks
abed el salam
thanks ,
fashion design
hey Thanks for this :) lovely gallery
Ahmet
This work very good! Thank you very much..
Creamy CSS Gallery
Great and really helpful post! Thanks a lot for sharing nice stuffs! You do a great work for your visitors! Thank you! ;)
Besides, I’m going to use this gallery in my new project,.. :)
ralph
i love it. really saves great amount of time creating stunning webpages.
CSS Gallery
As usual another great article! We have indexed webdesignerwall.com at CSS Gallery.com Keep up the great articles!
CSSGallery.com
gallery
i want to click then run an popup (the same). help me!
Julian
muchas gracias, thanks. this is so easy and useful.
Steffen
This is fantastic! Looks amazing.
Keith D
Can’t wait to try this on my own site.
Thanks..
Keith D
Jasper
i like it
Fahad
Its a great contribution not only this post but the whole website
z.Yleo77
this tutorial was very very useful。。thanks。
shadolen White
Thanks.. I’m a student with a lot learning to do.
this is sweet I came to your site.
onearmfrog
simply amazing!
Webmaster Mexico
Excellent post!! Thanks for the examples.
titi
I have some problems with the image which is placed to far from the left and top of my post, I don’t really know where I need to fix in the css…
http://www.titi.me/disney/ (first post)
titi
fixed :) I use div instead of ul…
please delete my blog url thanks for this usefull idea !
Many
very nice!! very very useful!!
Priyanka
I find the whole website really useful and keep coming back here whenever i face challenges from our clients.
Jemima Taylor
addesignlink is a beautiful, functional design gallery based directory only for best beautiful designed web 2.0 styled websites. The web organized by topic into categories. … Help build the largest human- edited directory on the web.
Submit your website for free to the internet’s fastest growing directory! Category based and cross-referenced.
Directory is a beautiful, free, and can be used as a starting point for many different types of websites: Blogs, Joomla, Web2.0, Flash and so much more.
deeve
Hi,
I like your concept but appears not to align the overlay .png correctly in Google Chrome. It does so correctly in IE7 & Firefox. I use the rounded corners example & modified to work with Next Gen Gallery thumbs.
Any ideas?
William X.
Man, your tutorials are simply fantastic!! The effects and ideas are brilliant. Love to see more amazing css tricks. thanks a lot
m111m
Thank you very much
Watin
This is excellent tutorial, thanks
Vince
Very interesting tutorial. Thanks !
cartoon photo
this is wonderful!
i have to try this ‘framing trick’ myself.
thanks for the tutorial. you’re great!
Eugene
smart article, thank you from Russia!
elite gamers
Thank you for the article, but how do I install the templates? I’am a little lost and a lot frustrated that I can not figure this out.
laurent
thanks a lot :)
Thomas Jehle
This is what i’m looking for, thanks a lot
greats from austria
venkat
Fantastic tutorial.thank you
Francesco
Impressive the clarity of the explanation! Thanks very much for the time spent for the tutorials.
Michael
Excellent work!!
Alex
Wonderful! Thanks a lot
greats from Russia
Brad
This is the best design tutorial I’ve ever read! Love your site’s style! Very Cool! Thanks for the excellent tutorial.
Paul
This is a fantastic tutorial – very creative. Thanks
I wonder if this will hold together with a mix of portrait and landscape orientations?
Michael Alvarez
Great Tutorial. But some do they work on all browsers?
Chris
Great post about Css design tutorial, and it give me an idea of how to decorate images and photo gallaries.and i also found some benefits about CSS tricks.Thanks for sharing this useful post.
Calgary Graphic Design
I really have to try these out. Brilliant post – thanks!!!
Thess
Hi!
Seems like the decorative-gallery-demo.zip file is corrupt, cant open it?!
koming
Good tutorial, thanks…
Alexiel
Nice Tuts!…. but your file is damaged, please reupload, tnx
Gee
hey great script,
I just gave this technique a go, it worked a charm the first time but the second time the borders seem to go behind the image and not covering the image like their supposed to. I was wondering if you could possibly point me in the right direction for fixing this?
cennet
Thanks What’s the problem here? Google could bury the meager profit number from even the biggest media conglomerates.
cennetevi
these are awesome!
thanks for putting in the effort to get this list together
keaglez
Thanks, that was awesome…
rybber
Looks nice, but your example assumes that all thumbnails are horizontal with the same dimensions. When you use different thumbs it doesn’t looks as good. Can you please do a version for different sized thumbs?
Aaron
Such great work, your skills are to be admired.
Thank you very much for sharing, it really helped me understand this technique a lot more.
Regards,
Aaron
Aoobi
Nice article. Seems like the decorative-gallery-demo.zip file is corrupt, cant open it?!
bagsin
Seems like the decorative-gallery-demo.zip file is corrupt, cant open it?!
Chris
Nice job. :]
Mudassir Siddiqui
wow…so nice…:) its really amazing ..:) :S but file is corrupt..now what??
Cyrus
Great , CSS Decorative Gallery
Great article. CSS saved web design
Cyrus
Visit http://www.psdtoxhtmlcoder.com
Custom Gift
These are great! I’m going to try and incorporate with my CSS driven promotional product and custom business gift web site. Thanks!
Daniel
Would it be possible to add one of theese frames to some non image div?
Kat Thompson
Fantastic, thanks so much – these things I always imagine to be quite complex but you’ve shown how easily website design can be made to look that little bit more individual. Thanks.
Erwin Schro
Thanks for the great tutor for noob like me…will implement it for my joomla-based gallery site.
masterx
my nutsack balls have swollen reading this tremendous mind blasting tutorial. keep it up.
BASINGLASS
This place is a gold mine, the great ideas never end :)
Thanks for the tools and files provided, very awesome background tricks…and thanks for the IE hacks!
– BP
http://www.basinpipes.com
Nathan
Worked perfectly for me! The jQuery method is absolutely great.
iGrog
Great graphics, great code, but am I the only ones that has different size images? I’m sure I,we, can tweek it like you did on you page ‘backtotop’ footer.
Luya Tshimbalanga
Very impressive tutorial. I am on my way to revamp my own website and was looking to make a good gallery page. I graduated as Graphic Designer and wished to know early about this website.
A great thank you for providing inspiration. One day I will share skill about the css and soon experimenting with SVG.
Andres
Very good blog! nice articles!
ruby
ninguno
ruby
$(document).ready(function(){
//prepend span tag
$(“.photo a”).prepend(“”);
});
Mike
Thanks for the great tutor for noob like me…
brady
Dude you are wesome, I love your site and your tutorials are outstanding…I just was curious in ordert to make the css decorative gallery work in wordpress with the NextGen Gallery do I need to somehow alter any php documents to get the extra span tag added in wherever a thumb is??? thanks in advanve for any help
Sebastiaan
OK, 408 comments, don’t have time to read them all, I just wanted to say thanx ;-) So many articles, so many solutions. This was by far the simplest – and easy to implement in a ColdFusion webstore environment where the HTML is dynamically created!
Again, thanx for putting this out there ;-)
Rojish
Nice information.
Thanks…..
Oxifeanevefak
SOPALMIVIOUMS
yd5f
Nikita
Thank you for your time and will helping others!
ThiNg
I used this technique to create some fancy image bases checkboxes in a form I am desigining. You can read the full details here on my blog. Thanks for posting this great technique!
Biswa
This is one of the best CSS tutorial ever I have seen on NET.I really thankfull to you for this great tutorial.Beacuse you have publish your technique.Really really Great CSS Tips and Tutorial.
vincentdresses
The designs showed here show what simple and tasteful design is all about. Another one to consider
brenda
BrEnDa
nikhil
really a gr8 script..now its easy to frame a image. thanx for sharing it !!
Derrick
Awesome trick!
Is it possible to overlay THREE images? I have three PNG’s with transparency, I’d like to have them overlaid so I can create some neat effects with each individual PNG.
Michael
Hi, there!
when you came out with this, quite a time ago, i was really impressed but i realized (as well as also other people commenting here) that you can not use the decorative frames with any other picture sizes than the frame size. so you had to create the frames for every picture size you wanted to use them with, but since i have no idea of PS, i had to think in something else…
now i come back to give you a cross-browser jquery plugin based mainly on the border-image and border-width CSS3 properties where available and the jQuery Border Image Plugin by lrbabe where not.
check it out
and enjoy carnival!
Sumon
One of the best website of learning CSS design. Thanks for all the tips.
pascal
belle realisation en CSS c’est simple et toujours efficace d’embellir des images d’un site .. car trop de jquerry kill mootools
aksoft
thanks~
Medya
Oh My god …
thank you very much for sharing this lesson with us ..
it’s Really Fantastic job ..
Jack
thanks for sharing these designs. just what i was looking for
nXqd
Well content . Thanks so much for great explaining :)
ZM
thank u, very helpful.
bye
ZM
Greya
Hi!
Great post again!
I’m trying to implement this method in the default wordpress [gallery] and I don’t understand where should I prepend the in this case?
Could you, please, give me any tips?
Thanks!
Artur
thank you for a great lesson. now everything is clear and I know how to use that tag. thanks !!! This is the best site for web design learners.
Ranjit
Simply Awesome.. thanks..
spor
thanks for sharing, ı will test it..
esther
ZzzzzzzzzzzzzZZZZZZZZZZZzzzzzzzzzzzzZ
Web Design
Amazing thank you for sharing
Rayhan Chowdhury
Its a amazing tutorial, thanx for sharing…
crusher
well good . learning
Gaby
Thank you!! Very helpful, great technique and great explanation. And looks beautiful!!
wallpapers desire
i have implemented this in http://www.wallpapersdesire.com it’s great…..thanks
slovnyk
cool design – i like it! really beautiful.
i’m trying to find out how to make complex design with css and images, but i can’t understand how to correctly position blocks and how to add background images in order, for example, to make a frame consisting of top left, top right, bottom right and bottom left corners, each of them should have background image and between them should be positioned some text…
Alex
great
thank you
DuMendes
Hi, Tkx for the tutorial. I have a question: how did u manage to overwhelm the IE 6 png transparence problem?
Thank you!!!
grinding mill
beautiful pictures
raymond mill
Thank you for your share, you information is useful for me.
Andy Hunt
The span tags are unnecessary. Create an unordered list like so:
<ul>
<li> <a href=”#”></a> <img></img> </li>
</ul>
Assign the <li> “position:relative; height:whatever; width:whatever;” and assign the <a> “position:absolute; display:block; background-image:your overlay image; height:whatever; width:whatever;”
cone crusher
Thank you!! Very helpful, great technique and great explanation. And looks beautiful!!
cone crusher
Thank you for your share, you information is useful for me.
grinding mill
Very good! It’s very helpful.Thank you!
vertical roller mill
It’s very beaulity!
cone crusher
great
thank you
Mash Banda
This is a visually simple and yet effective trick to know thanx a lot
#Beaming :-)
Web Dizajn Design21th
Great! THX…
PHL Parking
Excellent CSS Gallery, I really like this!
angel
very interesting post, thanks for sharing..
Claudio
Hi guys, I need your advise, I have 30 galleries in nextgen gallery with 8 different TAGS and i want to use the mini icons gallery in wich the icons shows according to the tag I assign to gallery or photo. I was thinking in create different templates for the different galleries, but I don’t know how to make the icons appear. I ‘m using wp 3 and ngg 1.5.5.
Thanks for any help.
(Sorry for my english)
West Coast Designer
wonderful techniques! Thank you very much for the tutorial!
Joy
Hello,
I represent http://www.dollarcade.com – an online game site. This site is made with css and without the help of
table.
Please review our website and consider it to feature it on your site.
Thanking you for your time.
With Regards
Joy
CAROLAY ORTEGA
ESTAN DIVINS
crusher machine
WO,It’s so Beautiful! But some picture I don’t konw the mean
EasyLifeTerm.com
My web designer recommended that I take a look at your article and list. I am so glad that I did. Thanks for your research and list.
grinding mill
Is the css compatible with IE6 and firefox???
christian
hey i used sample 6 (the one with the yellow car here), just modified the non-javascript version, so you can use it for any size for any picture. So what i basically did is, cutting 4 cut edges (ol=oben links=upper left; or=oben rechts=upper right; ul=unten links=down left; ur=unten rechts=down right) as single images and include each of them in a seperate span tag placing them absolute:
CSS:
.image_container {
margin: 10px;
position: relative;
float: left;
}
.image_container img {
background: #fff;
border: solid 1px #ccc;
padding: 4px;
}
.image_container img:hover {
border: solid 1px #999;
}
.cut_corner_ol {
display: block;
position: absolute;
width:25px;
height:25px;
top: -5px;
left: -5px;
background: url(images/cut_corner_ol.png) no-repeat;
}
.cut_corner_or {
display: block;
position: absolute;
width:25px;
height:25px;
top: -5px;
right: -5px;
background: url(images/cut_corner_or.png) no-repeat;
}
.cut_corner_ul {
display: block;
position: absolute;
width:25px;
height:25px;
bottom: 15px;
left: -5px;
background: url(images/cut_corner_ul.png) no-repeat;
}
.cut_corner_ur {
display: block;
position: absolute;
width:25px;
height:25px;
bottom: 15px;
right: -5px;
background: url(images/cut_corner_ur.png) no-repeat;
}
BODYCODE:
–> without the * of course… works like a charm :)
christian
BODYCODE:
*div class=”image_container”*
*a href=”#” rel=”lightbox” title=””*
*span class=”cut_corner_ol”* */span*
*span class=”cut_corner_or”**/span*
*span class=”cut_corner_ul”**/span*
*span class=”cut_corner_ur”**/span*
*img src=”images/3.jpg” width=”300″ height=”200″ alt=”” /*
*/a*
*/div*
–> without the * of course… works like a charm :)
Kenzo
Great Examples!!
SD
Excellent write up!
This technique is exactly what I was looking for and more! Beautifully implemented!
SD
H Barrett
Hi,
I have a question I was wondering if you could help me with. I am using nextGEN gallery and on the demonstration pages of this plugin it shows that examples 1 – 6 are the Idea & Design from Web Designer Wall. I am trying to remove links from my thumbnails and notice in example 5, http://nextgen-gallery.com/templates/example-5/, you have done just that. How did you do it? Did you manage to do it with CSS? I noticed that there is a template=sample5 in the code. Did you create a new template and how? I would really like to figure this out. I posted the question “How to remove thumbnail links” in the nextGEN forum as well as maybe there is something easy I don’t know about.
Thanks in advance.
فيس بوك
professional teaching you should pay we for this tutorial
Leo
Thank you so much for this tutorial!
I’ve used it here http://www.ninhacozinha.com
Leo
Oswaldo
I loved the styles demonstrated here. I’m a beginner with CSS and I just would like to know if I can use any border style for mouseover effect. For example you would put the “brown city” frame as a mouseover effect in one of your examples.
Thanks!
startac
ive been looking online for some css to modify the existing wordpress css for galleries. this post is great but i just don’t know how to get from A to B
Chantal
Merci beaucoup pour vos idées ! Super travail !
Thanks you
@+
Chantal C
Adriana
Thanks for sharing, I was just looking for something like this for a website I am designing…
vitt
It’s a vevy interesting idea use CSS for decoration pictures.
Thanks.
Nu-z
AMAZING! Thanks for the amazing article, everything I was looking for as a matter of fact!!
I had so much fun here!! keep up the good work!! :)
Rhoel
Fantasic ideas and technical details! Bookmarked!
ravi
. Demo
ravi
R4
ravi
RAVI
max henrry
cool .. 100 punts tks <3
Ale
Is it possible to use this customization with a WordPress gallery ? Which one of my theme .css i need to modify to have this new frames on my gallery?
Thank you :)
Melvins
Very awesome and pretty great design. I like all of above.
Los Angeles Web Design
jiimena snap crazy
la verdad me gustaria aprender muchisimo a hacer este tipo d cosas pero lastimosamente la pagina esta en ingles y no e podido leerla muy bn =( me encantaria q ubiese una pagina como esta en español mi idioma! =)
Henry Peise
First out was the iPhone 3G and as you can see the end result is very washed out and a bit grainy but you can choose white iphone 4 instead.
mikwillson
Your article’s resource box should help to persuade your readers. No matter how amazing your article is if it’s not succeeding in driving traffic to your website cheap ugg boots
Juno Mindoes
No wonder, with white iphone 4 in your hand will make you be the focus of the crowd! You won’t miss it!
laura
sta buenisima esta pág
Isah
I need a well decorate html for my site
Uçak Bileti
vardi butun derslerin gunahi oldum
Simona
Another great source for those who wants to see menus, web site trends, galleries, free extension and job for freelancers etc, visit http://www.1artmedia.com, you have online demo and free download. Hope that will be useful for you…
Ben
I stumbled on this while googling for some lyrics, I’ll be sure to come back. thanks for sharing.
gr33nie
What talent you have!
I have seen websites where an image(s) has a frame around it and I always wondered how that was done and now I know coming across your website.
Anyways, I’d like to know if this can be done to a rotating banner/jquery/carousel. I don’t understand the difference or the jargon. I need to see examples in action and cut and paste instructions.
Any help, suggestions, ideas, links, books would be greatly appreciated.
Thank you!
(I am a total newbie to website building and design.)
gr33nie
Oops!
forgot to mention that I am talking about the “#5b. Art Gallery – Gold Frame”
TheMagic
Your frames are superb – they remind me a lot of the framed images from http://www.350.com
tütüne son
I need a well decorate html for my site
altın çilek
web sites and nice works thanks
hcg damla
I stumbled on this while googling for some lyrics, I’ll be sure to come back. thanks for sharing.
sherlly
ea
Bryan
CSS is a very important part of designing. I must say that you had given a great idea to decorate the image without changing source image.
Florida Web Design
Lawrence
Hi,
nice usage of CSS. I would like to ask you, for your golden frame.
it is possible to upload 2 photos into it rather than just one ?
Your answer to this is greatly appreciated.
Warmest Rdgs,
Chun Wey
Rob
Hi, I’ve been playiing around with the HTML & CSS code, but can’t seem to get this to work.
Any advice on what I;ve done wrong would be appreciated !
By the way had to take out the ”
head>
title>
/head>
body>
div class=”photo”>
a href=”#”>
span>
img src=”photo09.jpg” />
/a>
/div>
/body>
/html>
}
body
}
.photo {
margin: 30px;
position: relative;
width: 180px
height: 130px;
}
.photo span {
width: 20px;
height: 18px;
display: block;
position: absolute;
top: -12px;
left: 90px;
background: url(antique_frame1.jpg) no-repeat;
}
Thanks
hurhaberci
it’s too important…
How To Put On A Condom | How To Get Taller
Inspires the artist in me. Thanks!
How To Get Taller | How To Put On A Condom
A lot of ways to get artistic online. Thanks for this powerful knowledge.
Rob
Many thanks for the tutorial !
I have found one problem I can’t seem to resolve and any advice would be greatly appreciated.
I have notice I can only get the code to work/display correctly if the image files I use have block security within the properties. If i unblock the security restriction then the images do not display within the gallery ! I have looked at forums to find a solution for this but have to date been able to find one that works.
MyB
Inspires the artist in me. Thanks!
dexx
Another questionnaire, the participants’ problem identification and structuring, idea generation, problem elaboration and clarification, such as creativity, problem solving insertion sezkin idea which one’s preferred styles are evaluated. While participants preferred the style of non-disclosure and intellectual development of ADHD, with ADHD, participants chose to produce ideas.
Guillermo
How would you apply this on NextGen wordpress gallery? I can see this demos but no explanation about the way to do it:
http://nextgen-gallery.com/templates/example-1/
Any tip will be welcome.
Brenne Meirowtiz
Thank you for sharing all of your marvelous tricks! Do do beautiful work!
Tom Helme
Great tutorial – I’ve used it as basic image protection on my partners website, a transparent png overlay. Preferable to disabling right click.
Xi Wang chan
A lot of thanks ^^!!!… I’m moving my website to a new host, then I’m improving some features, and this tricks are very very beauty and useful n_n…
SEO
Is a program that can design a variety of styles, very interesting.
Rich
I’m curious if you can apply these styles to NextGen Gallery ALBUMS. I’ve seen plenty of styles applied to galleries, but it’s tough to see any for styling the albums themselves. Thanks!
Aaron
@Rich –
It is possible. I know the NextGen Gallery site mentions but doesn’t have any description on how to do it. You have to download the static HTML examples from this site then follow the directions to create the template file for NextGen gallery in your site’s theme folder (http://nextgen-gallery.com/templates/). This is a PHP file. You will have to copy the elements over from the example you wish to use and do some code editing. I created gallery-template.php file in the directory mentioned above, I also put the image file and css in that folder too. Don’t forget to call the gallery and include the template you wish to use with the short code: [ nggallery id=1 template=sample1 ]
Neel
Hi I am still learning php,css. can you share the template code so we can get an idea…
David
Agreeing with Neel…. I would love to see a sample of how you coded it to call on your styling! Thanks!
Honlapkészítés
This awesome! Very like it – thank you!
طراحی وب سایت
Is a program that can design a variety of styles, very interesting.
Mini Blinds For Windows
Hey just wanted to give you a quick heads up. The text in your post seem to be running off the screen in Internet explorer. I’m not sure if this is a format issue or something to do with web browser compatibility but I figured I’d post to let you know. The layout look great though! Hope you get the issue resolved soon. Thanks
Darío Martínez Batlle
Quite nice! Thanks, I’ll try to use this on one of my sites. It makes any gallery to look fresh and fun.
complex41
And then he handed you the thirty-five 45
xbox 360
Fantastic, thanks so much
heis
thanks, very goods jobs
jordan
[…] CSS Decorative Gallery […]
aytas
Fantastic web site!! Thank you so much!
Sasha
You are the MAN! Thanks again for the great tutorial and tips. I have followed you about 4 years now and you’re really talent…
kubodo
i ever try this tutorial it’s very great but i have problem when use a gradient, gradient didn’t work..could you help me
Best Small Dog Breeds
#2. Photo With Text is so Good, Thank you.
masum
Good – I should certainly pronounce, impressed with your site. I had no trouble navigating through all tabs and related info ended up being truly easy to do to access. I recently found what I hoped for before you know it at all. Reasonably unusual. Is likely to appreciate it for those who add forums or anything, website theme . a tones way for your client to communicate. Nice task.
P. R
This tutorial is excellent.. Thank you
spring valley vitamins
definitely, a BIG BIG deals.thx, for article
Custom IDX Solutions
Nice tutorials they are very good. Thanks so much for sharing.
mina
thank you .
rowshan
better site
hossein
thanx for your tutorial
very nice…!
Matthew
Can somebody please explain specifically how to apply this to NextGen gallery thumbnails? I would like to use a rounded thumbnail but i’m new to webdesign and i’m afraid of messing up my site (again). My NextGen Gallery can be seen here with the default boring square thumbnails: http://www.mattrice.comuf.com/wordpress/photos/photos-4-0/
Any help is appreciated!
Cecelia
Hi Matthew,
I’m having the same problem. Did they respond to you? If so, what was there response?
Peace,
Cecelia
Fran
I made a tutorial here, in order to apply this great tool to NextGen Gallery –> http://www.ajwan.net/wordpress/tutti-frutti/nextgen-custom-themes/
I hope it’ll help
Alex
Could you please tell me is there is a way to create something like the Featured Kittens section on http://PersianKittenEmpire.Com
Get all the thumbnails close together with effects.
Please let me know,
Thanks!
Sara
Great!! just what I needed. Thanks a lot! :)
bitkisel
Thank you Thank you!! This is organized very nicelytt
crudu ctin
where is the code for :roudend corner:?
yarandi
very nice…!
but i have a little problem , i use this method
https://webdesignerwall.mystagingwebsite.com/demo/decorative-gallery/2_photo-with-text.html
and my bullet show in left picture, i want delete li bullet in this.
can any one help me?
bart
Wow, great! I try this Cork Board Gallery!
Adward
where is the code for :roudend corner:?
cheap hcg drops canada
I am curious to find out what blog system you’re utilizing? I’m experiencing some small security issues with my latest website and I would like to find something more secure. Do you have any recommendations?
etaireia security
I stumbled on this while googling for some lyrics, I’ll be sure to come back. thanks for sharing.
Cecelia
Can you please explain specifically how to apply this to NextGen gallery thumbnails in WordPress? I would like to use the gold frame thumbnail.
You can see my plain thumbnails here http://stlcatholic1.larryjacob.com/priests-deacons/
Thank you so much!!!
Ojan
I’m so glad, found this tutorial. Thank you very much..
Tom Key
This frames are for one size of thumbnails only?
Yuri
Very very beauty :)
tnx to share !
Have a nice day ^_^
net true
Very very beauty :) Thank you for share